.NET Core Tip 2: How to troubleshoot Memory Leaks within a .NET Console application running in a Linux Docker Container in Kubernetes
How to spot the memory leak in the .NET Core application running within a linux docker container with Kubernetes?
- Introduction
We often think because Garbage Collector automatically manages the memory usage since the .NET Framework 1.0 release, we don't need to worry about it. And in .NET Core, the script must be the same right?
Well wrong! Garbage Collector, commonly known as GC, helps us big time reclaiming the objects which are not referred to anymore. But GC can't help us when objects are still referred to but are not used (they are essential "dead" objects, we can compare this situation a bit to "dead" code which is not used anymore but still clutter our code base).
So if we are not careful with our code we can have two situations:
- A big-time memory leak: the memory leak is fast and easy to notice, and easier to fix most of the time
- A sneaky memory leak: it is slower, less noticeable and often harder to fix
A memory leak can happen for thousand of reasons, but we can list the main causes:
- a static collection getting bigger
- a caching which doesn't release the items after a while
- a long time running thread with a local variable which references a big collection for example
- unmanaged memory which is not released manually as expected (.net core often uses unmanaged code behind the scenes)
- captured variables which gets its TTL (time to live) longer
- Not calling the Dispose method when expected
- Very complicated object dependencies which could make removing objects harder
- Wrong use of string manipulation
- Wrong use of Finalizers
- Wrong use of Event subscription
- Deadlocked Threads which will never release the objects
- Wrong use of pointers (I know it is very vague and hard to pinpoint !)
It is not a complete list, but it can give us a lot of clues already :)
Ok here is the context, we don't see any memory leak in the QA environment, so we decide to deploy our .NET Core miracle on the production Kubernetes cluster.
But after a while, the pods are restarted whenever our memory level reaches the limit.
We are like "damn" we have a memory leak and don't have any way or tool to see the problem when our application runs within a docker container in the Kubernetes production cluster...
Well fortunately it is not true, we have several ways to resolve our memory leak! Microsoft put a lot of tools we can download directly from our docker container running our .NET application with the memory leak problem!
It is what the article is about today :)
- Context
First, we will use the Linux container docker for our demo. Moreover, we will use the Linux distribution Debian and a .net core application.
For this demo, I will use a straightforward case: a console application with a long-running task which will add items to a collection every single second.
Why a console application? Because that way we will go to the essential of our problem, the memory leak. The Code Base will be very simple but will reveal all we need to know when we handle a complex real-life situation!
- Tools
We will see several tools which can help us.
For this demo we will need :
- Visual Studio 2022
- Docker Desktop for running the docker container runtime and building our docker image
- minikube for having a kubernetes cluster with a single node for our demo
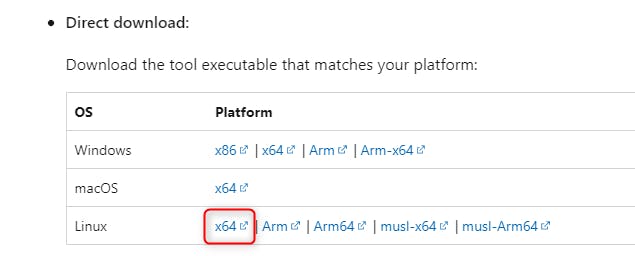
- dotnet-dump tool for Linux with the x64 architecture from a direct download from the Microsoft download website (https://aka.ms/dotnet-dump/linux-x64).
We will create a docker image from our demo application made with .Net Core. Then we will deploy our demo to our Docker Desktop Kubernetes cluster.
At last, we will install the following tool: dotnet-dump directly from within our application running docker container.
- Demo application
Let's create our demo:
Please find the complete code base here:
MemoryLeak .NET Core 6.0 Console Application Demo
Here I will use the most simple template we can find: Console Application.
We will create a very simple .NET 6.0 console application (.NET 6.0 has Long Term Support (LTS)).
We do this so we know what we need to add and avoid a lot of boilerplate code which can make our tutorial less clear.
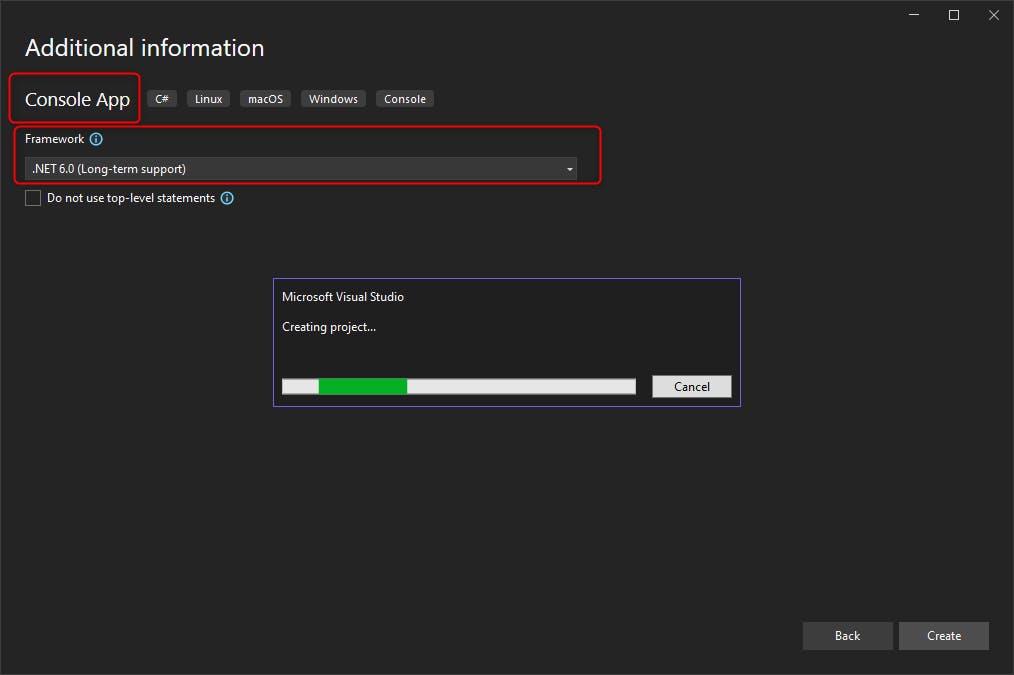
We will need to add the following nuggets:
<ItemGroup>
    <PackageReference Include="Microsoft.Extensions.Caching.Abstractions" Version="6.0.0" />
    <PackageReference Include="Microsoft.Extensions.Caching.Memory" Version="6.0.1" />
    <PackageReference Include="Microsoft.Extensions.Hosting" Version="6.0.1" />
    <PackageReference Include="Microsoft.VisualStudio.Azure.Containers.Tools.Targets" Version="1.17.0" />
  </ItemGroup>
We need first "Microsoft.Extensions.Hosting" which will help us to use the Dependency Injector (DI) container. It will be used for injecting 2 dependencies:
- Logger
- Memory Cache (see the next NuGet Microsoft.Extensions.Caching.Memory)
"Microsoft.Extensions.Caching.Memory" will help us to use the cache in memory for our demo.
We will show you how easy it is to have a memory leak problem when we badly use a Cache.
Please read this link if you are a beginner about Caching using memory in .net Core:
The current implementation of the IMemoryCache is a wrapper around the ConcurrentDictionary, exposing a feature-rich API. Entries within the cache are represented by the ICacheEntry and can be any object. The in-memory cache solution is great for apps that run on a single server, where all the cached data rents memory in the app's process.
So basically it is a wrapper around the famous ConcurrentDictionnary with further features we will use later on!
We get the following csproj:
https://gist.github.com/nicoclau/334b0c4371b18d9641a7982adc3d9f4b#file-memoryleak-csproj
At last a link with a very detailed and up-to-date documentation
https://github.com/dotnet/AspNetCore.Docs/blob/main/aspnetcore/performance/caching/memory.md
Now let's see how to run our console application with the Program.cs
using MemoryLeak;
using Microsoft.Extensions.DependencyInjection;
using Microsoft.Extensions.Hosting;

IHost host = Host.CreateDefaultBuilder(args)
    .ConfigureServices(services =>
    {
        services.AddMemoryCache();
        services.AddHostedService<MyWorker>();
    })
    .Build();

await host.RunAsync();
We use first the Generic Host which will give us many very useful features.
A host is an object that encapsulates an app's resources and lifetime functionality, such as:
- Dependency injection (DI)
- Logging
- Configuration
- App shutdown
- IHostedService implementations
Here we will use the IHostedService, Logging and Dependency Injection features.
In our application we need to configure the DI to add two services:
- Memory Cache Service (only when we don't use ASP.NET Core with AddMvc for example. Like in our case the console application)
- Hosted Service (we will detail why we use this type of service)
When we look at the extension method AddMemory
// Licensed to the .NET Foundation under one or more agreements.
// The .NET Foundation licenses this file to you under the MIT license.

using System;
using Microsoft.Extensions.Caching.Distributed;
using Microsoft.Extensions.Caching.Memory;
using Microsoft.Extensions.DependencyInjection.Extensions;

namespace Microsoft.Extensions.DependencyInjection
{
    /// <summary>
    /// Extension methods for setting up memory cache related services in an <see cref="IServiceCollection" />.
    /// </summary>
    public static class MemoryCacheServiceCollectionExtensions
    {
        /// <summary>
        /// Adds a non distributed in memory implementation of <see cref="IMemoryCache"/> to the
        /// <see cref="IServiceCollection" />.
        /// </summary>
        /// <param name="services">The <see cref="IServiceCollection" /> to add services to.</param>
        /// <returns>The <see cref="IServiceCollection"/> so that additional calls can be chained.</returns>
        public static IServiceCollection AddMemoryCache(this IServiceCollection services)
        {
            ThrowHelper.ThrowIfNull(services);

            services.AddOptions();
            services.TryAdd(ServiceDescriptor.Singleton<IMemoryCache, MemoryCache>());

            return services;
        }
....
}
You can find the source code there:
We can see that It will add a static instance of IMemoryCache: MemoryCache because it uses the Singleton pattern.
If you remember well a static variable can lead to a memory leak. So beware here.
We will now see why we used the hosted service. Remember we need a long-running console application which will add every second a cache item.
We need to host our console application in a service which can run all the time and can be shut down gracefully from any env: the dotnet runtime in a server, the docker container or the Kubernetes.
For this, we use the Hosted Service feature of the Generic Host.
Please find below the link with further details, here we will focus more on our context.
https://pgroene.wordpress.com/2018/08/02/hostbuilder-ihost-ihostedserice-console-application/
We will host our application in the Generic Host. When this Host starts, it will call the StartAsync method for every IHostedService registered inside the dependency container. In our case, we added one single hosted service manually called: MyWorker.
Let's look at our hosted service MyWorker source code:
using Microsoft.Extensions.Caching.Memory;
using Microsoft.Extensions.Hosting;
using Microsoft.Extensions.Logging;

namespace MemoryLeak
{
    public class MyWorker: BackgroundService
    {
        private readonly IMemoryCache _memoryCache;

        private readonly ILogger<MyWorker> _logger;

        public MyWorker(ILogger<MyWorker> logger, IMemoryCache memoryCache)
        {
            _logger = logger;
            _memoryCache = memoryCache;
        }

        protected override async Task ExecuteAsync(CancellationToken stoppingToken)
        {
            while (!stoppingToken.IsCancellationRequested)
            {
                _logger.LogInformation("Worker running at: {time}", DateTimeOffset.Now);
                await Task.Delay(1000, stoppingToken);

                var cacheEntryOptions = new MemoryCacheEntryOptions();

                _memoryCache.Set(Guid.NewGuid(), new byte[10000], cacheEntryOptions);
            }
        }
    }
}
Here we use a derived class from BackgroundService which helps us implementing properly the hosted service by overriding the StartAsync and StopAsync methods.
// Licensed to the .NET Foundation under one or more agreements.
// The .NET Foundation licenses this file to you under the MIT license.

using System;
using System.Threading;
using System.Threading.Tasks;

namespace Microsoft.Extensions.Hosting
{
    /// <summary>
    /// Base class for implementing a long-running <see cref="IHostedService"/>.
    /// </summary>
    public abstract class BackgroundService : IHostedService, IDisposable
    {
        private Task? _executeTask;
        private CancellationTokenSource? _stoppingCts;

        /// <summary>
        /// Gets the Task that executes the background operation.
        /// </summary>
        /// <remarks>
        /// Will return <see langword="null"/> if the background operation hasn't started.
        /// </remarks>
        public virtual Task? ExecuteTask => _executeTask;

        /// <summary>
        /// This method is called when the <see cref="IHostedService"/> starts. The implementation should return a task that represents
        /// the lifetime of the long-running operation(s) being performed.
        /// </summary>
        /// <param name="stoppingToken">Triggered when <see cref="IHostedService.StopAsync(CancellationToken)"/> is called.</param>
        /// <returns>A <see cref="Task"/> that represents the long-running operations.</returns>
        /// <remarks>See <see href="https://docs.microsoft.com/dotnet/core/extensions/workers">Worker Services in .NET</see> for implementation guidelines.</remarks>
        protected abstract Task ExecuteAsync(CancellationToken stoppingToken);

        /// <summary>
        /// Triggered when the application host is ready to start the service.
        /// </summary>
        /// <param name="cancellationToken">Indicates that the start process has been aborted.</param>
        public virtual Task StartAsync(CancellationToken cancellationToken)
        {
            // Create linked token to allow cancelling executing task from provided token
            _stoppingCts = CancellationTokenSource.CreateLinkedTokenSource(cancellationToken);

            // Store the task we're executing
            _executeTask = ExecuteAsync(_stoppingCts.Token);

            // If the task is completed then return it, this will bubble cancellation and failure to the caller
            if (_executeTask.IsCompleted)
            {
                return _executeTask;
            }

            // Otherwise it's running
            return Task.CompletedTask;
        }

        /// <summary>
        /// Triggered when the application host is performing a graceful shutdown.
        /// </summary>
        /// <param name="cancellationToken">Indicates that the shutdown process should no longer be graceful.</param>
        public virtual async Task StopAsync(CancellationToken cancellationToken)
        {
            // Stop called without start
            if (_executeTask == null)
            {
                return;
            }

            try
            {
                // Signal cancellation to the executing method
                _stoppingCts!.Cancel();
            }
            finally
            {
                // Wait until the task completes or the stop token triggers
                var tcs = new TaskCompletionSource<object>();
                using CancellationTokenRegistration registration = cancellationToken.Register(s => ((TaskCompletionSource<object>)s!).SetCanceled(), tcs);
                // Do not await the _executeTask because cancelling it will throw an OperationCanceledException which we are explicitly ignoring
                await Task.WhenAny(_executeTask, tcs.Task).ConfigureAwait(false);
            }

        }

        public virtual void Dispose()
        {
            _stoppingCts?.Cancel();
        }
    }
}
All we needed to do was to code the abstract method ExecuteAsync for our BackgroundService implementation.
  protected override async Task ExecuteAsync(CancellationToken stoppingToken)
        {
            while (!stoppingToken.IsCancellationRequested)
            {
                _logger.LogInformation("Worker running at: {time}", DateTimeOffset.Now);
                await Task.Delay(1000, stoppingToken);

                var cacheEntryOptions = new MemoryCacheEntryOptions();

                _memoryCache.Set(Guid.NewGuid(), new byte[10000], cacheEntryOptions);
            }
        }
This will be running in a loop for as long we don't ask to cancel with the Token. It is not to confuse with the SigTerm signal (with ctrl+C) because we have several CancellationTokens in different levels.
So basically this token created for this background service will never be cancelled in our project codebase.
Now we can see we take advantage of the logger which was injected with the DI and the memory cache also instanced by the DI.
We log the date, pause 1000 ms and insert a new item. We see we can configure the Entry insert with the MemoryCacheEntryOption.
We will see later on why we need it. For now, it does nothing.
Now we have:
- a Generic Host hosting the console application
- a single hosted service implemented as a Background Service will be run by the Host
It is a very simple demo. Let's create a docker image of our application now.
- Creating the docker image
With Visual Studio 2022, it is very simple to create it. We only need to add a Dockerfile to our project:
We click on our project MemoryLeak with the right button, select "Add" then "Docker support..." menu
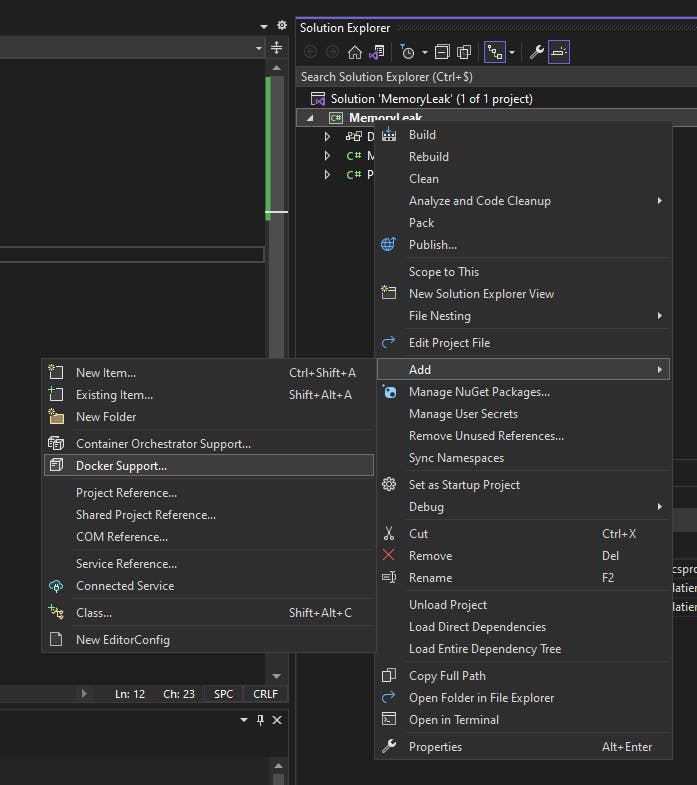
Visual Studio 2022 will create and add the following Dockerfile at the project root location:
#See https://aka.ms/containerfastmode to understand how Visual Studio uses this Dockerfile to build your images for faster debugging.

FROM mcr.microsoft.com/dotnet/runtime:6.0 AS base
WORKDIR /app

FROM mcr.microsoft.com/dotnet/sdk:6.0 AS build
WORKDIR /src
COPY ["MemoryLeak/MemoryLeak.csproj", "MemoryLeak/"]
RUN dotnet restore "MemoryLeak/MemoryLeak.csproj"
COPY . .
WORKDIR "/src/MemoryLeak"
RUN dotnet build "MemoryLeak.csproj" -c Release -o /app/build

FROM build AS publish
RUN dotnet publish "MemoryLeak.csproj" -c Release -o /app/publish /p:UseAppHost=false

FROM base AS final
WORKDIR /app
COPY --from=publish /app/publish .
ENTRYPOINT ["dotnet", "MemoryLeak.dll"]
Moreover Visual Studio 2022 will add the following run/debug option : Docker
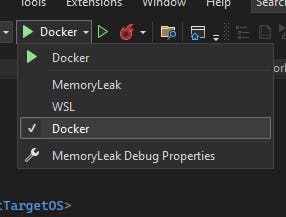
We can learn about this in the following link:
Let's run with the "Docker" option, we see:

The very first time (or when we update our project) Docker will be run by VS 2022 to build a special docker image that we can use to attach VS 2022 in debug.
We will get the following container window with the running container, the application logs :

So now we are sure our application will run on Kubernetes. Let's look at the memory usage of our container:
C:\Tutorial>docker stats
We get :

61MB in a very short time.
docker stats updates in real time the metrics
We see our memory consummation goes up :
72.12MiB / 12.43GiB
73.22MiB / 12.43GiB
74.82MiB / 12.43GiB
It's not massive but it will be at the end of the day! It never goes down, so we definitively have a memory leak.
Now let's see how to find the memory leak cause.
First we need to create a "real" docker image. For now we only have a "dev" docker image:
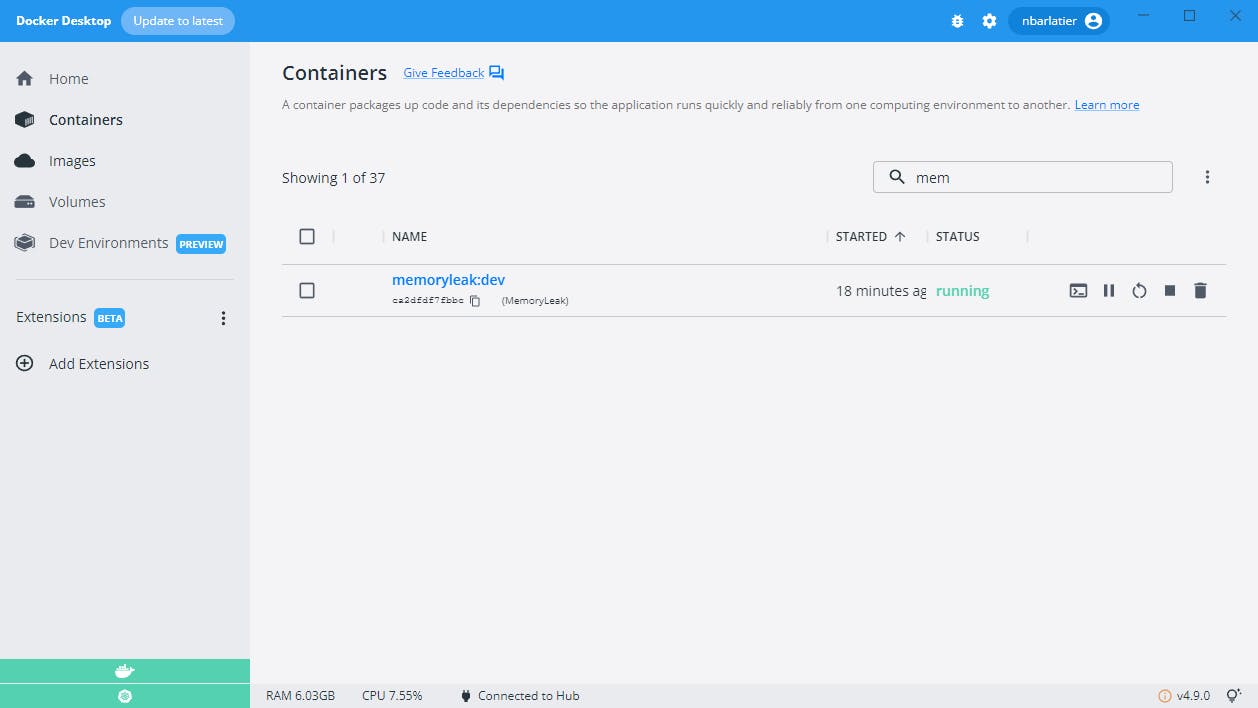
When we look at the running container:
CONTAINER ID IMAGE COMMAND CREATED STATUS
ca2dfdf7fbbc memoryleak:dev "tail -f /dev/null" 26 hours ago Up
We can see we don't have a command to run our application like we added in our dockerfile ENTRYPOINT ["dotnet", "MemoryLeak.dll"]. We see instead a phony command "tail -f /dev/null" which will just keep our container alive but without running our application. It will be the job of the VS 2022 when its debugger will run the application and attach itself to it.
Let's create our docker image proper :)
First let's stop our "dev" container:
> docker stop ca2dfdf7fbbc
> docker ps -a

ca2dfdf7fbbc   memoryleak:dev         "tail -f /dev/null"      26 hours ago    Exited (137) 10 seconds ago
Now let's go to the MemoryLeak.sln location
λ tree . /f Folder PATH listing for volume OS Volume serial number is yyyy C:\xxxx\MEMORYLEAK │ .dockerignore │ .gitattributes │ .gitignore │ MemoryLeak.sln │ README.md │ └───MemoryLeak
Then run the following command docker build and we need to tell where is Dockerfile. We need to run the command from the solution root.
λ docker build -f MemoryLeak\Dockerfile -t memoryleak:1 .
[+] Building 53.3s (18/18) FINISHED => [internal] load build definition from Dockerfile 0.1s => => transferring dockerfile: 733B 0.0s => [internal] load .dockerignore 0.1s => => transferring context: 382B 0.0s => [internal] load metadata for mcr.microsoft.com/dotnet/sdk:6.0 0.4s => [internal] load metadata for mcr.microsoft.com/dotnet/runtime:6.0 0.5s => [build 1/7] FROM mcr.microsoft.com/dotnet/sdk:6.0@sha256:a78.. 39.1s => => resolve mcr.microsoft.com/dotnet/sdk:6.0@sha256:a78.. 0.0s => => sha256:31b3f1ad4ce1f369084d0f959813c51df0ca17d9877d5ee88c2db6ff88341430 31.40MB / 31.40MB 8.1s => => sha256:7ed415b4bd19c2b83ef768757b22c5156111db042fd62be4263ba200b4c0c8d0 15.17MB / 15.17MB 4.9s => => sha256:357910a178d4d646acde36bf2c2a95fc59893a78c92a56a47ef8cc89627f850a 31.63MB / 31.63MB 8.2s => => sha256:a788c58ec0604889912697286ce7d6a28a12ec28d375250a7cd547b619f19b37 1.82kB / 1.82kB 0.0s => => sha256:3f5873abb5240a10f3abee05c6f89933d2da0b06037a0532aeb7ddd7959f8252 2.01kB / 2.01kB 0.0s => => sha256:05057078be7d5b0fdc8424f965a11d416639373f9388ecaeb4e2af2ce5bbc1c4 7.17kB / 7.17kB 0.0s => => sha256:7b9388913c3cc3dacffa41ae2bb30c18b54cc5f522fa6ef2faacf48b0dff6020 156B / 156B 5.0s => => sha256:871ef3419da3410a47aa97b7655d8543add053e27cac5c5922ff3ee1f75793cd 9.46MB / 9.46MB 8.1s => => sha256:c3514d10142f3a43d3037bc770248d6093c76d46a47ebe8ac4232c8b29d9eaab 25.37MB / 25.37MB 14.0s => => sha256:c65769fdd163d4fcba401982b5b50f0f78ec1970e68c45fb6671a8864c977683 148.14MB / 148.14MB 31.2s => => sha256:8b2829492cd27a90e4bde8169f4c4e3d2e6c17be2354f230684b05d40ea6df90 12.89MB / 12.89MB 12.6s => => extracting sha256:31b3f1ad4ce1f369084d0f959813c51df0ca17d9877d5ee88c2db6ff88341430 44.4s => => extracting sha256:7ed415b4bd19c2b83ef768757b22c5156111db042fd62be4263ba200b4c0c8d0 1.0s => => extracting sha256:357910a178d4d646acde36bf2c2a95fc59893a78c92a56a47ef8cc89627f850a 40.0s => => extracting sha256:7b9388913c3cc3dacffa41ae2bb30c18b54cc5f522fa6ef2faacf48b0dff6020 0.0s => => extracting sha256:871ef3419da3410a47aa97b7655d8543add053e27cac5c5922ff3ee1f75793cd 0.6s => => extracting sha256:c3514d10142f3a43d3037bc770248d6093c76d46a47ebe8ac4232c8b29d9eaab 2.5s => => extracting sha256:c65769fdd163d4fcba401982b5b50f0f78ec1970e68c45fb6671a8864c977683 6.6s => => extracting sha256:8b2829492cd27a90e4bde8169f4c4e3d2e6c17be2354f230684b05d40ea6df90 0.6s => [internal] load build context 0.1s => => transferring context: 6.34kB 0.0s => [base 1/2] FROM mcr.microsoft.com/dotnet/runtime:6.0@sha256.. 15.7s => => resolve mcr.microsoft.com/dotnet/runtime:6.0@sha256.. 0.0s => => sha256:357910a178d4d646acde36bf2c2a95fc59893a78c92a56a47ef8cc89627f850a 31.63MB / 31.63MB 8.2s => => sha256:dfa132a1bcb0339f54b2b518052c866986c0bb6fd77bdf692dbd3cea4c6111e6 1.82kB / 1.82kB 0.0s => => sha256:52b235bf8819546e70018d2c0612d06c28f4ac1675f54e596eda99eb3757d154 1.16kB / 1.16kB 0.0s => => sha256:66f36cf5dbe3c14bb49f5b84faba4c36ac65130f464446a00818b4d217ca6abd 2.80kB / 2.80kB 0.0s => => sha256:31b3f1ad4ce1f369084d0f959813c51df0ca17d9877d5ee88c2db6ff88341430 31.40MB / 31.40MB 8.1s => => sha256:7ed415b4bd19c2b83ef768757b22c5156111db042fd62be4263ba200b4c0c8d0 15.17MB / 15.17MB 4.9s => => sha256:7b9388913c3cc3dacffa41ae2bb30c18b54cc5f522fa6ef2faacf48b0dff6020 156B / 156B 5.0s => => extracting sha256:31b3f1ad4ce1f369084d0f959813c51df0ca17d9877d5ee88c2db6ff88341430 3.0s => => extracting sha256:7ed415b4bd19c2b83ef768757b22c5156111db042fd62be4263ba200b4c0c8d0 1.0s => => extracting sha256:357910a178d4d646acde36bf2c2a95fc59893a78c92a56a47ef8cc89627f850a 2.0s => => extracting sha256:7b9388913c3cc3dacffa41ae2bb30c18b54cc5f522fa6ef2faacf48b0dff6020 0.0s => [base 2/2] WORKDIR /app 0.9s => [final 1/2] WORKDIR /app 0.2s => [build 2/7] WORKDIR /src 1.3s => [build 3/7] COPY [MemoryLeak/MemoryLeak.csproj, MemoryLeak/] 0.1s => [build 4/7] RUN dotnet restore "MemoryLeak/MemoryLeak.csproj" 3.9s => [build 5/7] COPY . . 0.3s => [build 6/7] WORKDIR /src/MemoryLeak 0.1s => [build 7/7] RUN dotnet build "MemoryLeak.csproj" -c Release -o /app/build 4.4s => [publish 1/1] RUN dotnet publish "MemoryLeak.csproj" -c Release -o /app/publish /p:UseAppHost=false 3.1s => [final 2/2] COPY --from=publish /app/publish . 0.1s => exporting to image 0.1s => => exporting layers 0.1s => => writing image sha256:527b38b31f488ddefd8c3fe00bd47da30dbd88dfe36516c760866afb809c0a9f 0.0s => => naming to docker.io/library/memorylceak:1 0.0s
Use 'docker scan' to run Snyk tests against images to find vulnerabilities and learn how to fix them
It took a while the first time (only 0.3 seconds instead of 53.3 seconds!) If we do it again it will be way faster as Docker uses the cached layers:
λ docker build -f MemoryLeak\Dockerfile -t memoryleak:1 .
[+] Building 0.3s (18/18) FINISHED
 => [internal] load build definition from Dockerfile                                                                                                                                                                                     0.0s  => => transferring dockerfile: 32B                                                                                                                                                                                                      0.0s  => [internal] load .dockerignore                                                                                                                                                                                                        0.0s  => => transferring context: 35B                                                                                                                                                                                                         0.0s  => [internal] load metadata for mcr.microsoft.com/dotnet/sdk:6.0                                                                                                                                                                        0.1s  => [internal] load metadata for mcr.microsoft.com/dotnet/runtime:6.0                                                                                                                                                                    0.1s  => [build 1/7] FROM mcr.microsoft.com/dotnet/sdk:6.0@sha256:a788c58ec0604889912697286ce7d6a28a12ec28d375250a7cd547b619f19b37                                                                                                            0.0s  => [base 1/2] FROM mcr.microsoft.com/dotnet/runtime:6.0@sha256:dfa132a1bcb0339f54b2b518052c866986c0bb6fd77bdf692dbd3cea4c6111e6                                                                                                         0.0s  => [internal] load build context                                                                                                                                                                                                        0.0s  => => transferring context: 333B                                                                                                                                                                                                        0.0s  => CACHED [base 2/2] WORKDIR /app                                                                                                                                                                                                       0.0s  => CACHED [final 1/2] WORKDIR /app                                                                                                                                                                                                      0.0s  => CACHED [build 2/7] WORKDIR /src                                                                                                                                                                                                      0.0s  => CACHED [build 3/7] COPY [MemoryLeak/MemoryLeak.csproj, MemoryLeak/]                                                                                                                                                                  0.0s  => CACHED [build 4/7] RUN dotnet restore "MemoryLeak/MemoryLeak.csproj"                                                                                                                                                                 0.0s  => CACHED [build 5/7] COPY . .                                                                                                                                                                                                          0.0s  => CACHED [build 6/7] WORKDIR /src/MemoryLeak                                                                                                                                                                                           0.0s  => CACHED [build 7/7] RUN dotnet build "MemoryLeak.csproj" -c Release -o /app/build                                                                                                                                                     0.0s  => CACHED [publish 1/1] RUN dotnet publish "MemoryLeak.csproj" -c Release -o /app/publish /p:UseAppHost=false                                                                                                                           0.0s  => CACHED [final 2/2] COPY --from=publish /app/publish .                                                                                                                                                                                0.0s  => exporting to image                                                                                                                                                                                                                   0.0s  => => exporting layers                                                                                                                                                                                                                  0.0s  => => writing image sha256:527b38b31f488ddefd8c3fe00bd47da30dbd88dfe36516c760866afb809c0a9f                                                                                                                                             0.0s  => => naming to docker.io/library/memoryleak:1                                                                                                                                                                                          0.0s

Use 'docker scan' to run Snyk tests against images to find vulnerabilities and learn how to fix them
Now let's check our docker image:
λ docker images
REPOSITORY   TAG       IMAGE ID       CREATED         SIZE
memoryleak   1         527b38b31f48   8 minutes ago   190MB
Let's test our docker image by running one container:
λ docker run memoryleak:1
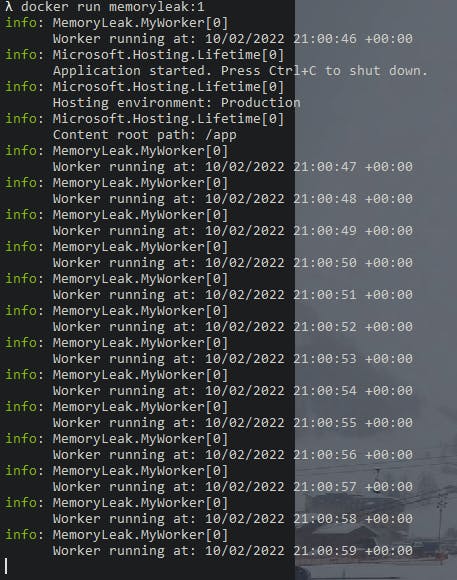
We are now ready to deploy it in one kubernetes cluster.
First we need to create easily this cluster.
We will use Minikube which is very simple and powerful and more than enough for our need here: We need only one node in the kubernetes cluster.
Please go the links:
Welcome Page https://minikube.sigs.k8s.io/docs/
Install Page https://minikube.sigs.k8s.io/docs/start/
It is very simple, it detects automatically the proper installer for your dev machine!
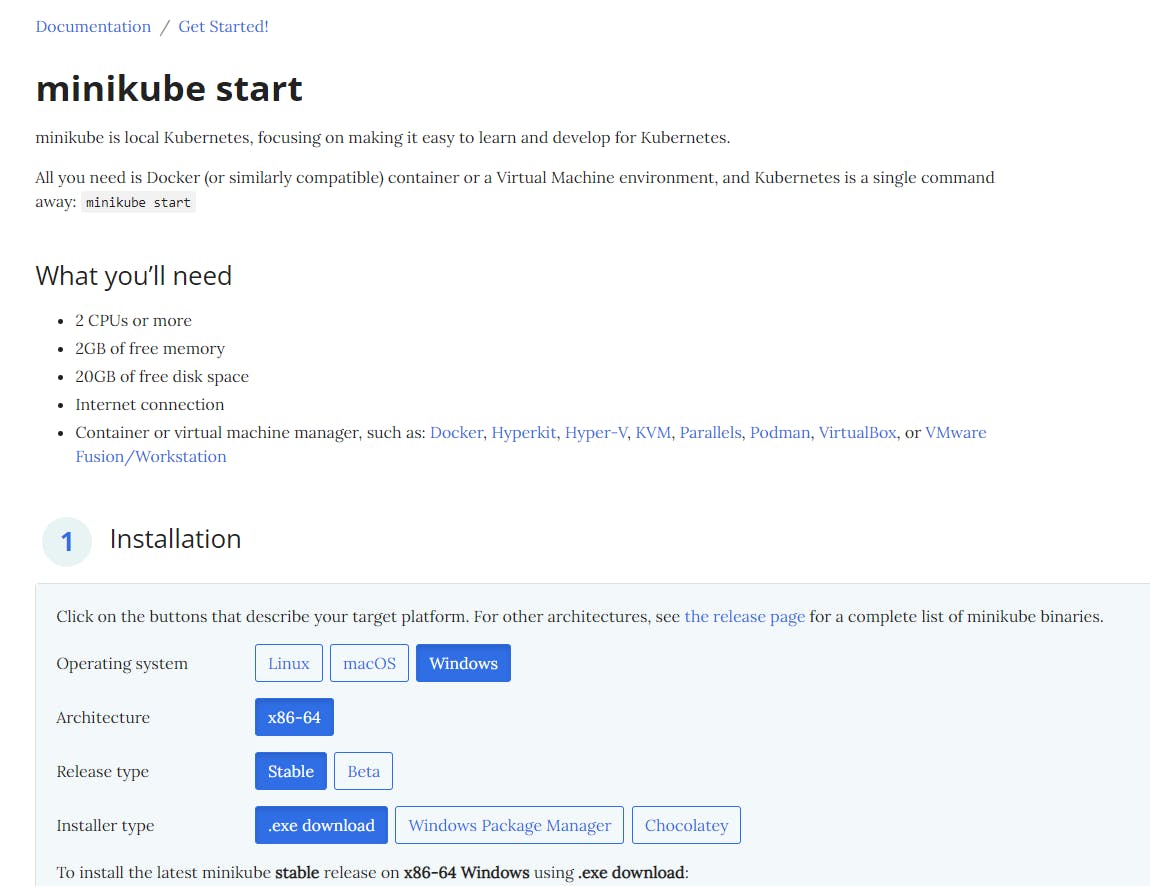
We need to run
λ minikube start --extra-config=kubelet.housekeeping-interval=10s
* minikube v1.27.0 on Microsoft Windows 10 Pro 10.0.19043 Build 19043
* Kubernetes 1.25.0 is now available. If you would like to upgrade, specify: --kubernetes-version=v1.25.0
* Using the docker driver based on existing profile
* Starting control plane node minikube in cluster minikube
* Pulling base image ...
* Updating the running docker "minikube" container ...
* Preparing Kubernetes v1.23.3 on Docker 20.10.12 ...
  - kubelet.housekeeping-interval=10s
* Verifying Kubernetes components...
  - Using image docker.io/kubernetesui/dashboard:v2.6.0
  - Using image docker.io/kubernetesui/metrics-scraper:v1.0.8
  - Using image gcr.io/k8s-minikube/storage-provisioner:v5
  - Using image k8s.gcr.io/metrics-server/metrics-server:v0.6.1
* Enabled addons: storage-provisioner, metrics-server, default-storageclass, dashboard
!! It is very important to pass the argument --extra-config=kubelet.housekeeping-interval otherwise we will get problem to get the metrics from the pods !!
We are ready to use our kubernetes cluster!
We also need to enable two add-ons:
- dashboard with the command: minikube addons enable metrics-server
- metrics-server with the command: minikube addons enable metrics-server
We must have the following add-ons enabled:
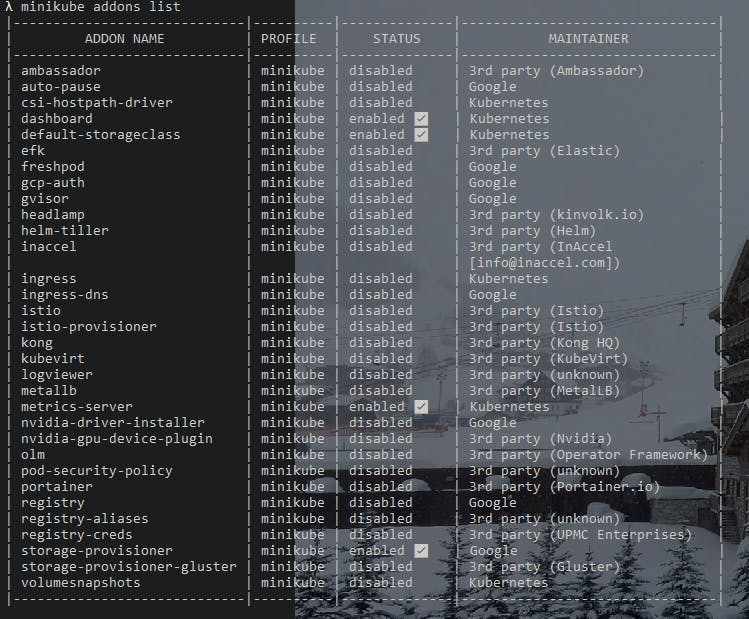
Let's open the dashboard:
λ minikube dashboard
* Verifying dashboard health ...
* Launching proxy ...
* Verifying proxy health ...
* Opening http://127.0.0.1:55675/api/v1/namespaces/kubernetes-dashboard/services/http:kubernetes-dashboard:/proxy/ in your default browser...
The browse opens and we see:
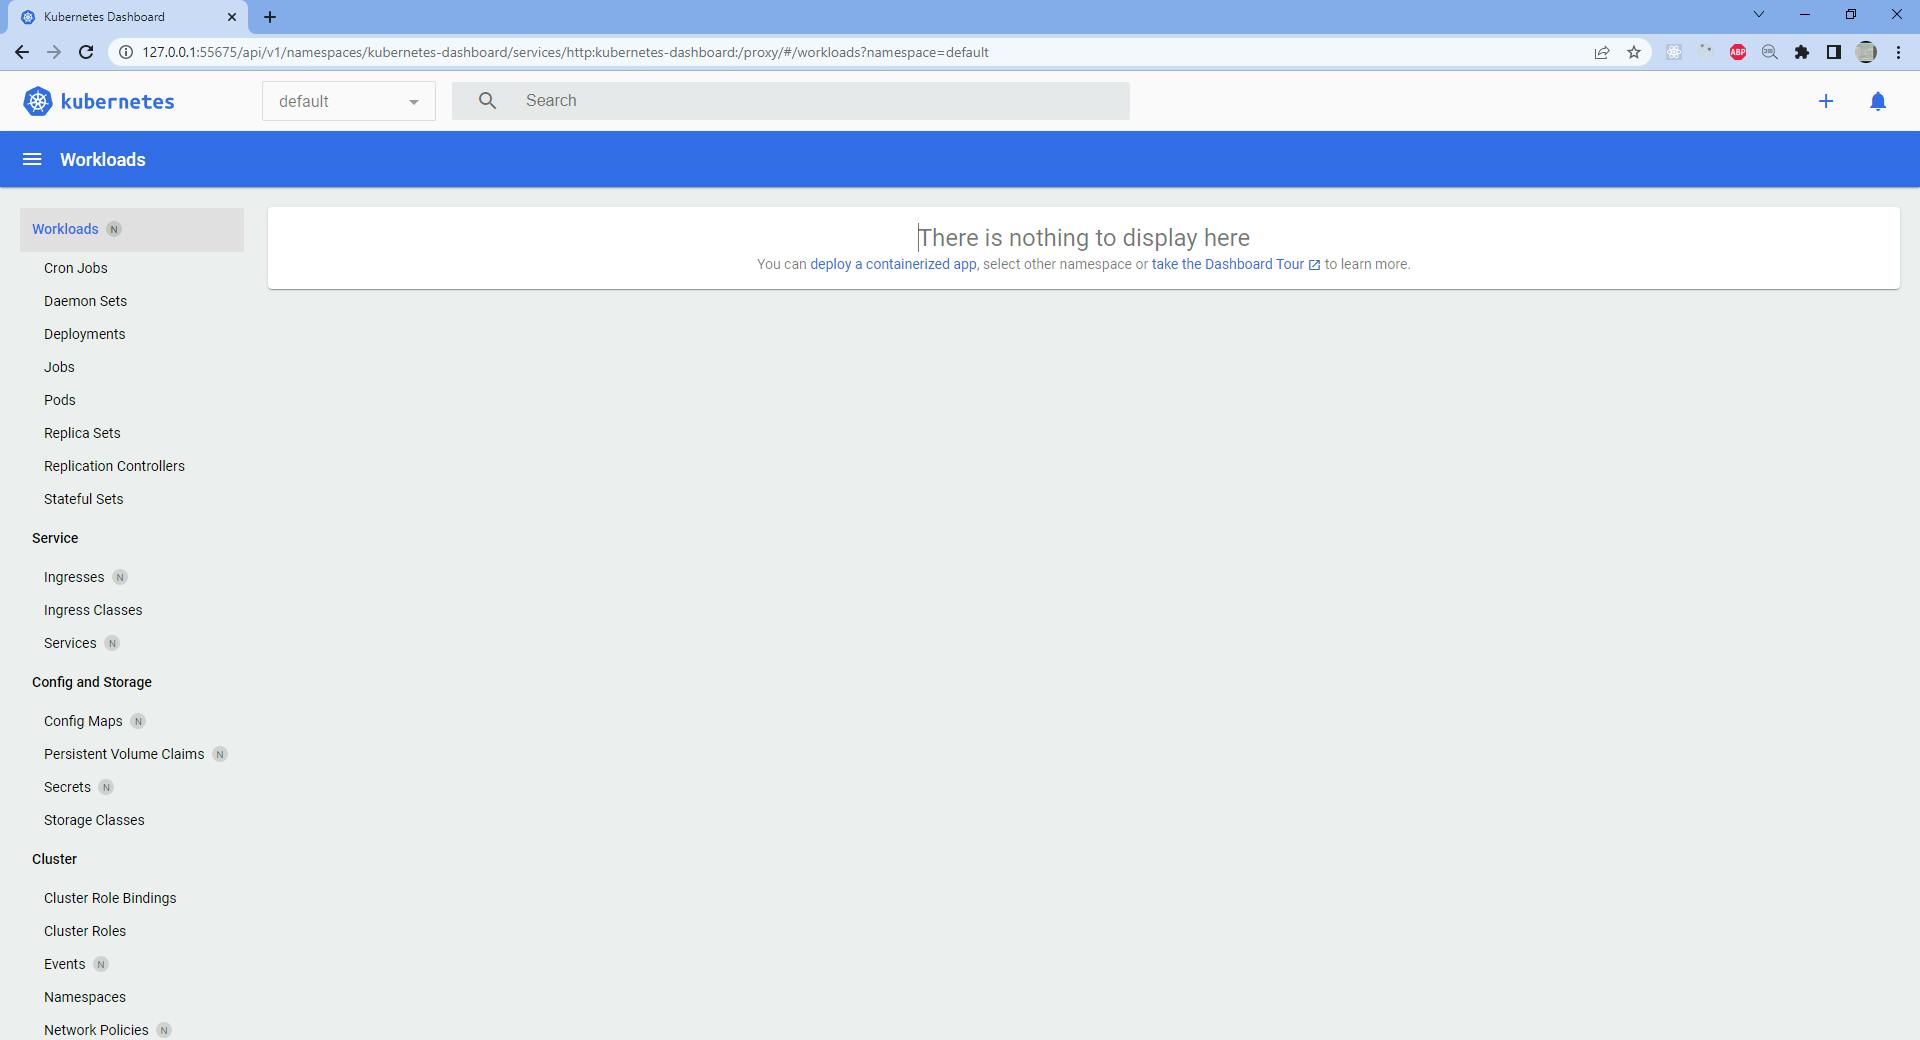
Let's add our memory leak docker image to the VM used by minikube:
λ minikube image load memoryleak:1
After a while the docker image is available in the VM.
Let's check:
We go to the VM with SSH:
λ minikube ssh
Last login: Fri Oct  7 21:00:52 2022 from 192.168.49.1
docker@minikube:~$ docker images
REPOSITORY                                 TAG       IMAGE ID       CREATED         SIZE
memoryleak                                 1         527b38b31f48   5 days ago      190MB
kubernetesui/dashboard                     <none>    1042d9e0d8fc   4 months ago    246MB
kubernetesui/metrics-scraper               <none>    115053965e86   4 months ago    43.8MB
k8s.gcr.io/metrics-server/metrics-server   <none>    e57a417f15d3   8 months ago    68.8MB
k8s.gcr.io/kube-apiserver                  v1.23.3   f40be0088a83   8 months ago    135MB
k8s.gcr.io/kube-controller-manager         v1.23.3   b07520cd7ab7   8 months ago    125MB
k8s.gcr.io/kube-scheduler                  v1.23.3   99a3486be4f2   8 months ago    53.5MB
k8s.gcr.io/kube-proxy                      v1.23.3   9b7cc9982109   8 months ago    112MB
k8s.gcr.io/etcd                            3.5.1-0   25f8c7f3da61   11 months ago   293MB
k8s.gcr.io/coredns/coredns                 v1.8.6    a4ca41631cc7   12 months ago   46.8MB
k8s.gcr.io/pause                           3.6       6270bb605e12   13 months ago   683kB
gcr.io/k8s-minikube/storage-provisioner    v5        6e38f40d628d   18 months ago   31.5MB
We can see the memoryleak docker image.
We can now deploy it and see the memory metrics with the metrics server!
Let's open the deployment form page:
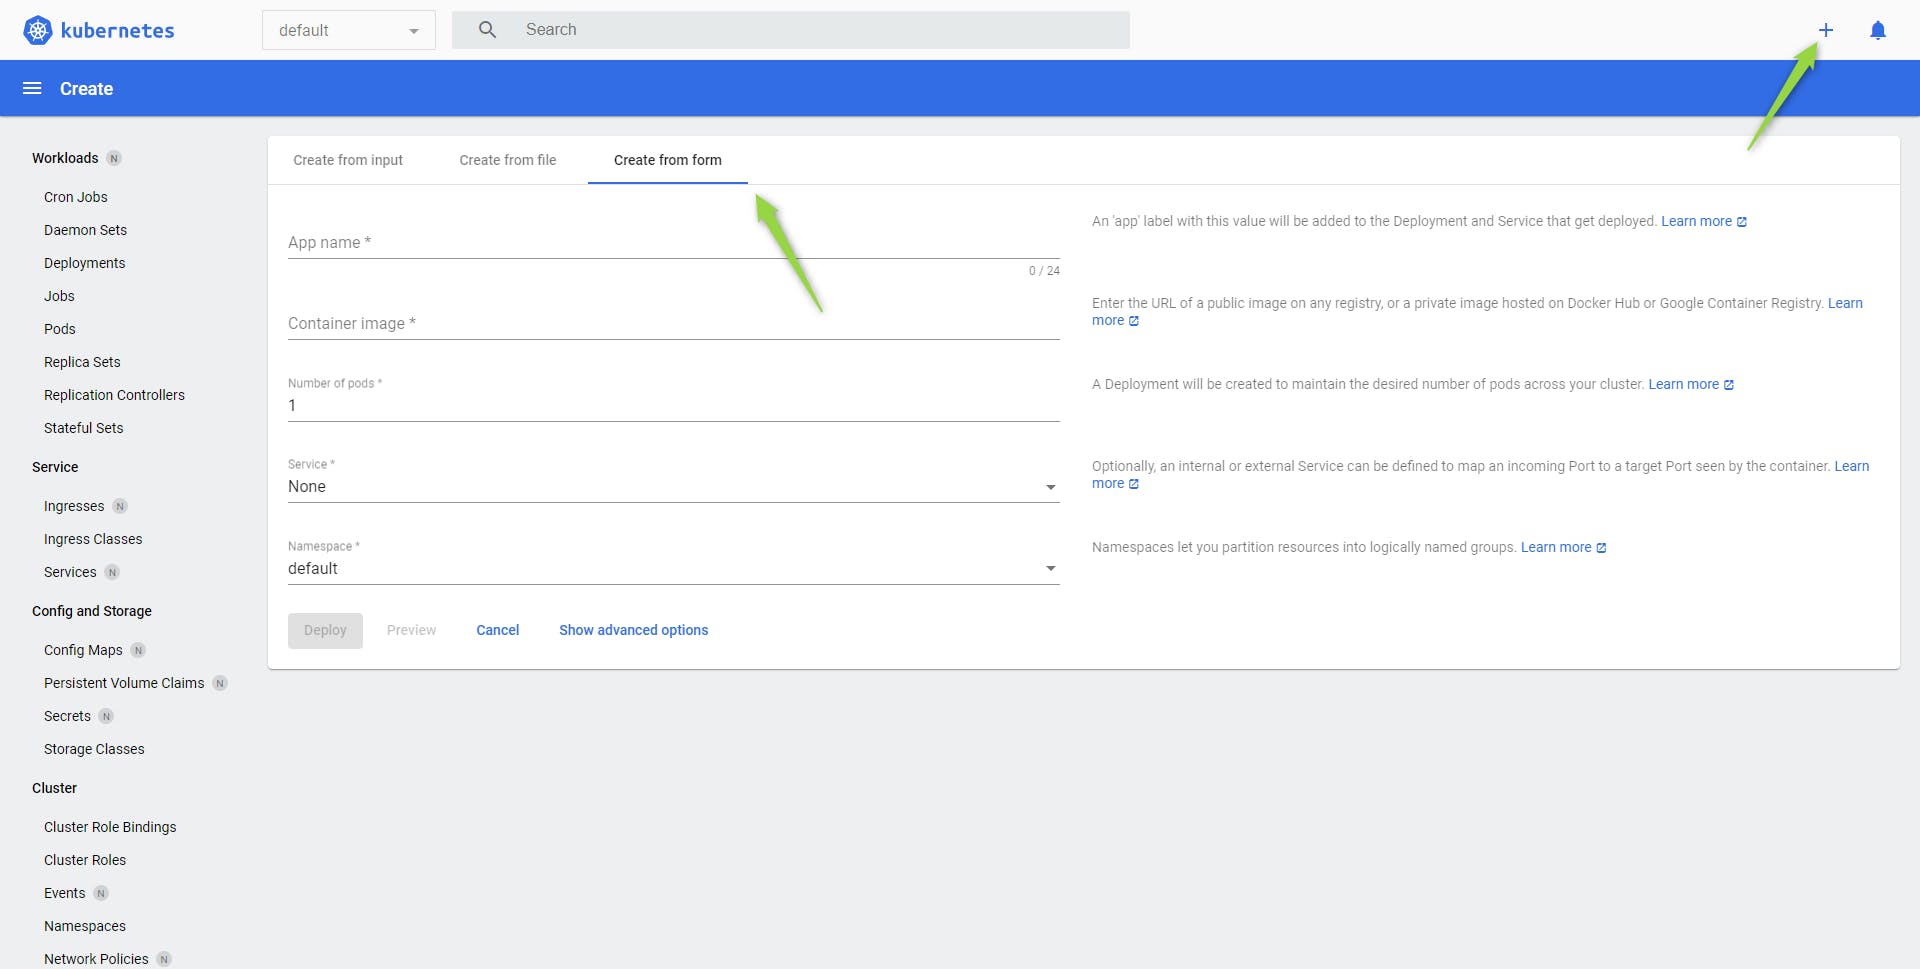
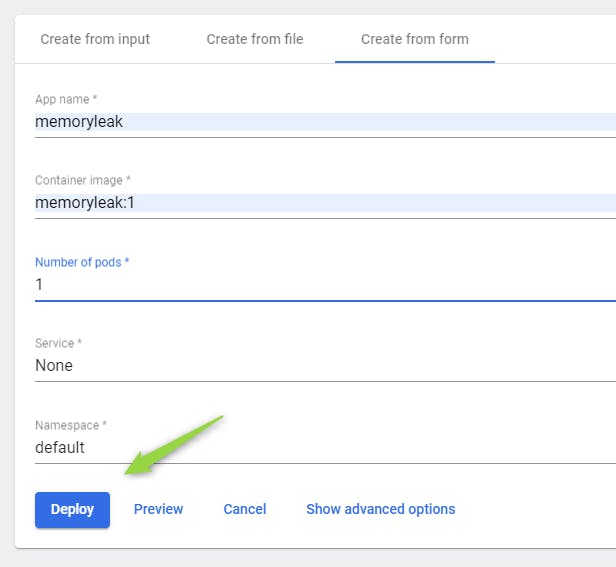
We click on Deploy
We get:
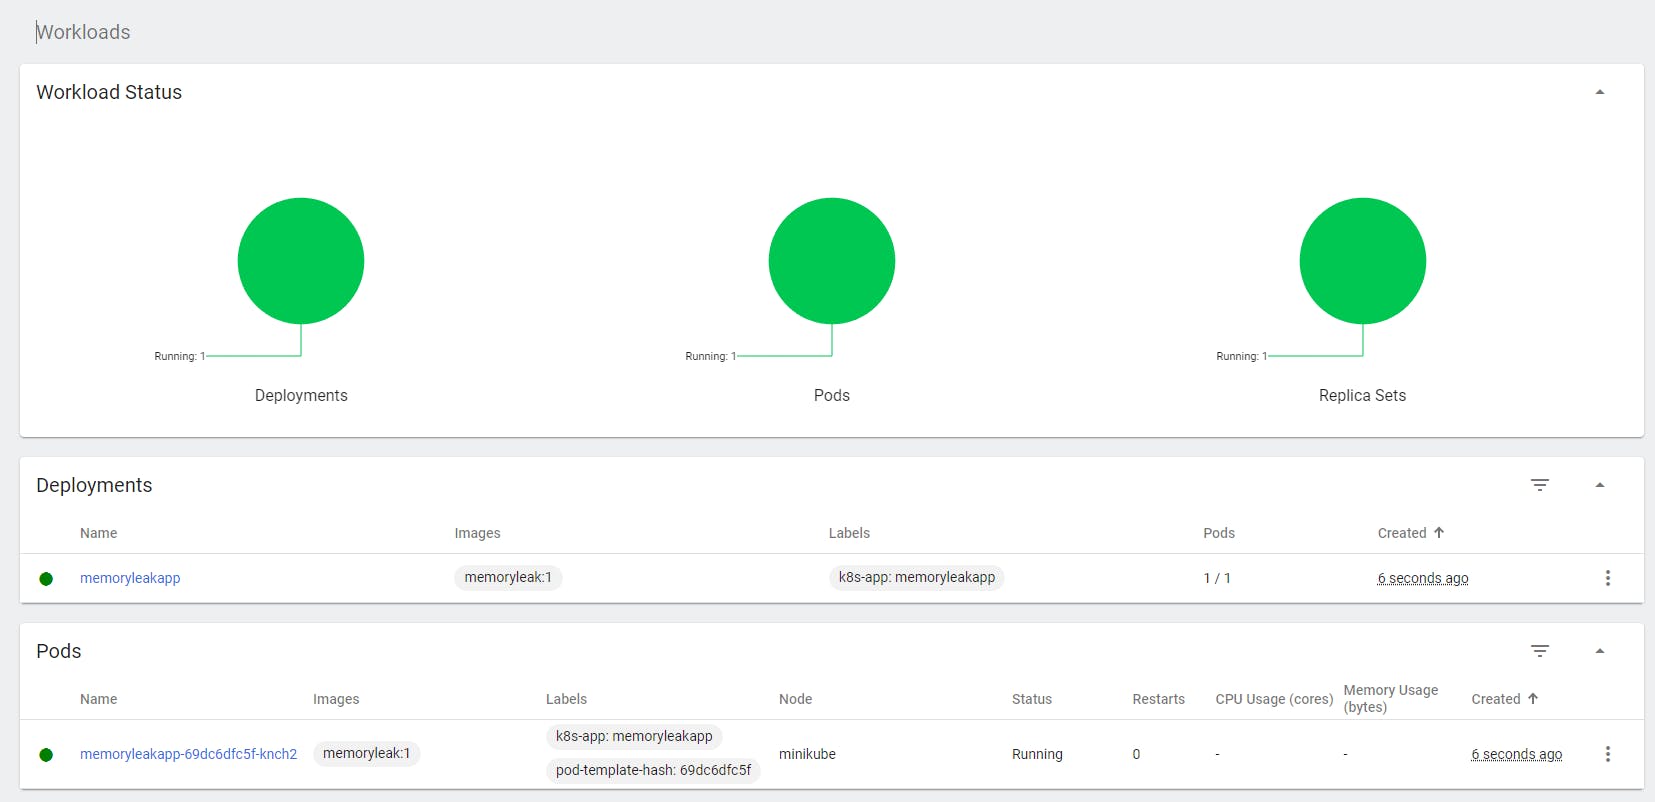
We deployed with success our app on the minikube cluster with one single pod with the deployment.
After a while we will see the CPU and memory metrics displayed:
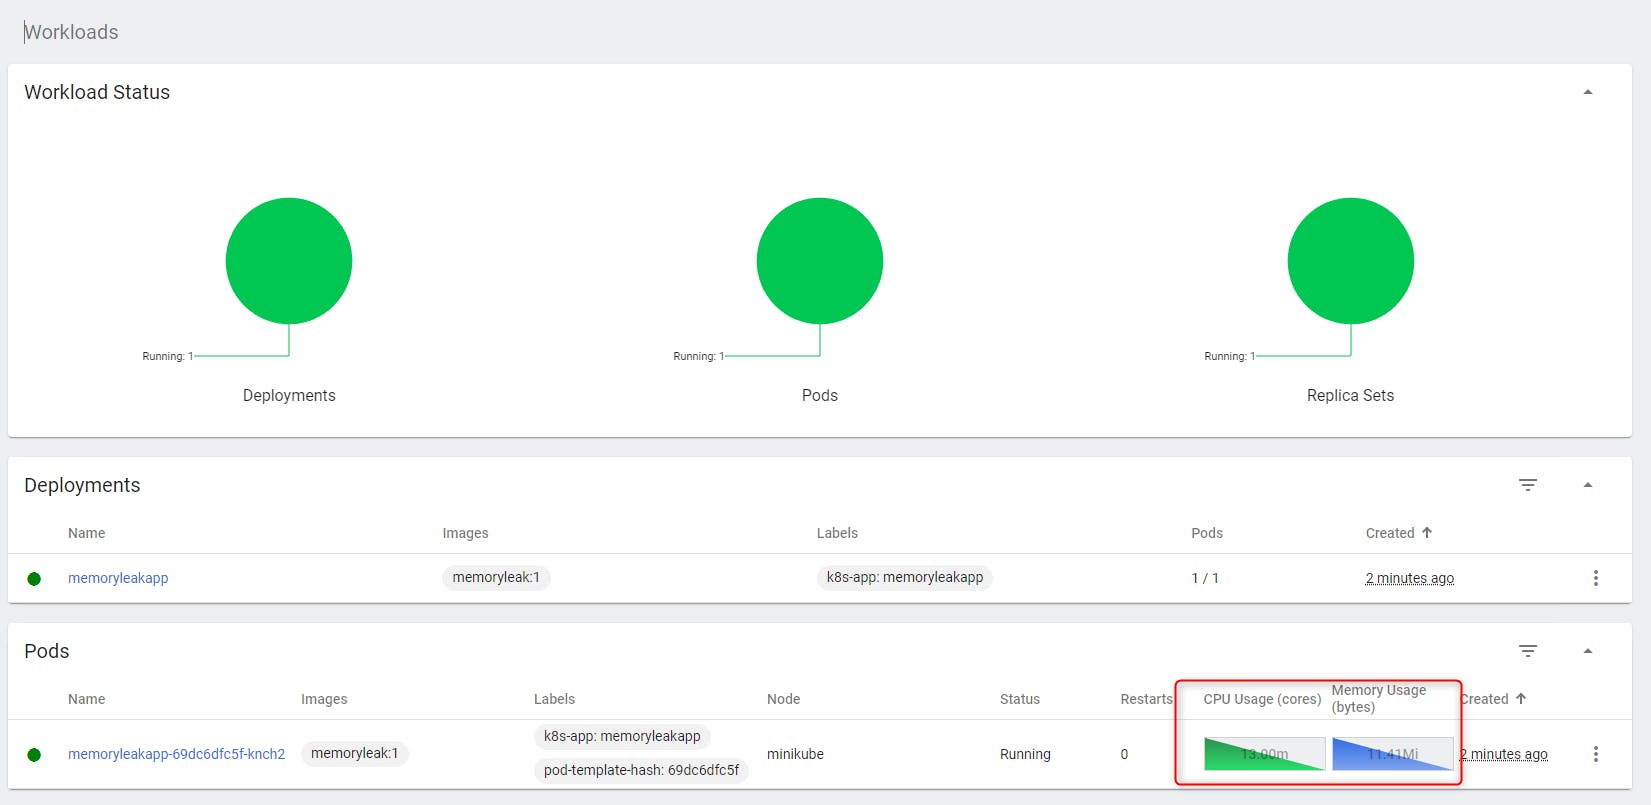
After several minutes we see the memory consummation evolution:

We can see the memory usage going up slowly but no stop.
We can see the log
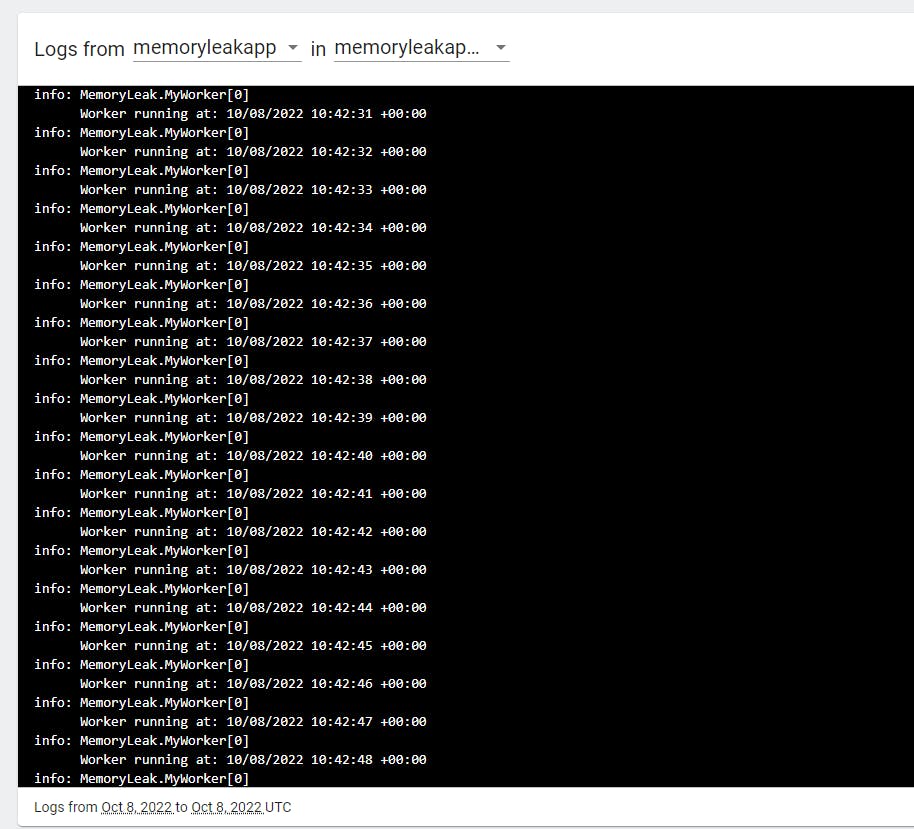
Let's see the memory usage in details
Click on Exec
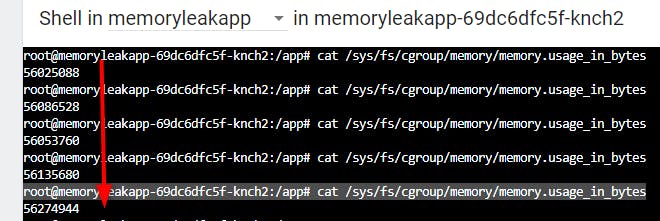
Let's run the command :
root@memoryleakapp-69dc6dfc5f-knch2:/app# cat /sys/fs/cgroup/memory/memory.usage_in_bytes
Run it many time and we can see the memory usage in bytes goes up no stop.
Now we saw the memory leak, let's see why it's happening by using another tool we need to install within the pod.
Install dotnet dump inside the pod
https://learn.microsoft.com/en-us/dotnet/core/diagnostics/dotnet-dump
We need to update the Debian Linux repo of our container and install the curl tool:
root@memoryleakapp-69dc6dfc5f-m28fv:/app# mkdir tools
root@memoryleakapp-69dc6dfc5f-m28fv:/app# apt update
Get:1 http://deb.debian.org/debian bullseye InRelease [116 kB]
Get:2 http://deb.debian.org/debian-security bullseye-security InRelease [48.4 kB]
Get:3 http://deb.debian.org/debian bullseye-updates InRelease [44.1 kB]
Get:4 http://deb.debian.org/debian bullseye/main amd64 Packages [8184 kB]
Get:5 http://deb.debian.org/debian-security bullseye-security/main amd64 Packages [189 kB]
Get:6 http://deb.debian.org/debian bullseye-updates/main amd64 Packages [6344 B]
Fetched 8587 kB in 2s (4037 kB/s)
Reading package lists... Done
Building dependency tree... Done
Reading state information... Done
1 package can be upgraded. Run 'apt list --upgradable' to see it.
root@memoryleakapp-69dc6dfc5f-m28fv:/app# apt install curl
Reading package lists... Done
Building dependency tree... Done
Reading state information... Done
The following additional packages will be installed:
  libbrotli1 libcurl4 libldap-2.4-2 libldap-common libnghttp2-14 libpsl5 librtmp1 libsasl2-2 libsasl2-modules libsasl2-modules-db libssh2-1 publicsuffix
Suggested packages:
  libsasl2-modules-gssapi-mit | libsasl2-modules-gssapi-heimdal libsasl2-modules-ldap libsasl2-modules-otp libsasl2-modules-sql
The following NEW packages will be installed:
  curl libbrotli1 libcurl4 libldap-2.4-2 libldap-common libnghttp2-14 libpsl5 librtmp1 libsasl2-2 libsasl2-modules libsasl2-modules-db libssh2-1 publicsuffix
0 upgraded, 13 newly installed, 0 to remove and 1 not upgraded.
Need to get 1979 kB of archives.
After this operation, 4361 kB of additional disk space will be used.
Do you want to continue? [Y/n] Y
Get:1 http://deb.debian.org/debian bullseye/main amd64 libbrotli1 amd64 1.0.9-2+b2 [279 kB]
Get:2 http://deb.debian.org/debian bullseye/main amd64 libsasl2-modules-db amd64 2.1.27+dfsg-2.1+deb11u1 [69.1 kB]
Get:3 http://deb.debian.org/debian bullseye/main amd64 libsasl2-2 amd64 2.1.27+dfsg-2.1+deb11u1 [106 kB]
Get:4 http://deb.debian.org/debian bullseye/main amd64 libldap-2.4-2 amd64 2.4.57+dfsg-3+deb11u1 [232 kB]
Get:5 http://deb.debian.org/debian bullseye/main amd64 libnghttp2-14 amd64 1.43.0-1 [77.1 kB]
Get:6 http://deb.debian.org/debian bullseye/main amd64 libpsl5 amd64 0.21.0-1.2 [57.3 kB]
Get:7 http://deb.debian.org/debian bullseye/main amd64 librtmp1 amd64 2.4+20151223.gitfa8646d.1-2+b2 [60.8 kB]
Get:8 http://deb.debian.org/debian bullseye/main amd64 libssh2-1 amd64 1.9.0-2 [156 kB]
Get:9 http://deb.debian.org/debian bullseye/main amd64 libcurl4 amd64 7.74.0-1.3+deb11u3 [345 kB]
Get:10 http://deb.debian.org/debian bullseye/main amd64 curl amd64 7.74.0-1.3+deb11u3 [269 kB]
Get:11 http://deb.debian.org/debian bullseye/main amd64 libldap-common all 2.4.57+dfsg-3+deb11u1 [95.8 kB]
Get:12 http://deb.debian.org/debian bullseye/main amd64 libsasl2-modules amd64 2.1.27+dfsg-2.1+deb11u1 [104 kB]
Get:13 http://deb.debian.org/debian bullseye/main amd64 publicsuffix all 20220811.1734-0+deb11u1 [127 kB]
Fetched 1979 kB in 0s (6724 kB/s)
debconf: delaying package configuration, since apt-utils is not installed
Selecting previously unselected package libbrotli1:amd64.
(Reading database ... 6985 files and directories currently installed.)
Preparing to unpack .../00-libbrotli1_1.0.9-2+b2_amd64.deb ...
Unpacking libbrotli1:amd64 (1.0.9-2+b2) ...
Selecting previously unselected package libsasl2-modules-db:amd64.
Preparing to unpack .../01-libsasl2-modules-db_2.1.27+dfsg-2.1+deb11u1_amd64.deb ...
Unpacking libsasl2-modules-db:amd64 (2.1.27+dfsg-2.1+deb11u1) ...
Selecting previously unselected package libsasl2-2:amd64.
Preparing to unpack .../02-libsasl2-2_2.1.27+dfsg-2.1+deb11u1_amd64.deb ...
Unpacking libsasl2-2:amd64 (2.1.27+dfsg-2.1+deb11u1) ...
Selecting previously unselected package libldap-2.4-2:amd64.
Preparing to unpack .../03-libldap-2.4-2_2.4.57+dfsg-3+deb11u1_amd64.deb ...
Unpacking libldap-2.4-2:amd64 (2.4.57+dfsg-3+deb11u1) ...
Selecting previously unselected package libnghttp2-14:amd64.
Preparing to unpack .../04-libnghttp2-14_1.43.0-1_amd64.deb ...
Unpacking libnghttp2-14:amd64 (1.43.0-1) ...
Selecting previously unselected package libpsl5:amd64.
Preparing to unpack .../05-libpsl5_0.21.0-1.2_amd64.deb ...
Unpacking libpsl5:amd64 (0.21.0-1.2) ...
Selecting previously unselected package librtmp1:amd64.
Preparing to unpack .../06-librtmp1_2.4+20151223.gitfa8646d.1-2+b2_amd64.deb ...
Unpacking librtmp1:amd64 (2.4+20151223.gitfa8646d.1-2+b2) ...
Selecting previously unselected package libssh2-1:amd64.
Preparing to unpack .../07-libssh2-1_1.9.0-2_amd64.deb ...
Unpacking libssh2-1:amd64 (1.9.0-2) ...
Selecting previously unselected package libcurl4:amd64.
Preparing to unpack .../08-libcurl4_7.74.0-1.3+deb11u3_amd64.deb ...
Unpacking libcurl4:amd64 (7.74.0-1.3+deb11u3) ...
Selecting previously unselected package curl.
Preparing to unpack .../09-curl_7.74.0-1.3+deb11u3_amd64.deb ...
Unpacking curl (7.74.0-1.3+deb11u3) ...
Selecting previously unselected package libldap-common.
Preparing to unpack .../10-libldap-common_2.4.57+dfsg-3+deb11u1_all.deb ...
Unpacking libldap-common (2.4.57+dfsg-3+deb11u1) ...
Selecting previously unselected package libsasl2-modules:amd64.
Preparing to unpack .../11-libsasl2-modules_2.1.27+dfsg-2.1+deb11u1_amd64.deb ...
Unpacking libsasl2-modules:amd64 (2.1.27+dfsg-2.1+deb11u1) ...
Selecting previously unselected package publicsuffix.
Preparing to unpack .../12-publicsuffix_20220811.1734-0+deb11u1_all.deb ...
Unpacking publicsuffix (20220811.1734-0+deb11u1) ...
Setting up libpsl5:amd64 (0.21.0-1.2) ...
Setting up libbrotli1:amd64 (1.0.9-2+b2) ...
Setting up libsasl2-modules:amd64 (2.1.27+dfsg-2.1+deb11u1) ...
Setting up libnghttp2-14:amd64 (1.43.0-1) ...
Setting up libldap-common (2.4.57+dfsg-3+deb11u1) ...
Setting up libsasl2-modules-db:amd64 (2.1.27+dfsg-2.1+deb11u1) ...
Setting up librtmp1:amd64 (2.4+20151223.gitfa8646d.1-2+b2) ...
Setting up libsasl2-2:amd64 (2.1.27+dfsg-2.1+deb11u1) ...
Setting up libssh2-1:amd64 (1.9.0-2) ...
Setting up publicsuffix (20220811.1734-0+deb11u1) ...
Setting up libldap-2.4-2:amd64 (2.4.57+dfsg-3+deb11u1) ...
Setting up libcurl4:amd64 (7.74.0-1.3+deb11u3) ...
Setting up curl (7.74.0-1.3+deb11u3) ...
Processing triggers for libc-bin (2.31-13+deb11u4) ...
We used the command: apt install curl
Now let's download our tool at the followin url:
root@memoryleakapp-69dc6dfc5f-m28fv:/tools# curl -L https://aka.ms/dotnet-dump/linux-x64 -o dotnet-dump
  % Total    % Received % Xferd  Average Speed   Time    Time     Time  Current
                                 Dload  Upload   Total   Spent    Left  Speed
  0     0    0     0    0     0      0      0 --:--:-- --:--:-- --:--:--     0
100 4005k  100 4005k    0     0  6492k      0 --:--:-- --:--:-- --:--:-- 8674k
We created a directory at /tools and downloaded our tool there:
Now we need to make the dotnet-dump an excecutable file:
root@memoryleakapp-69dc6dfc5f-m28fv:/tools# chmod +x dotnet-dump
root@memoryleakapp-69dc6dfc5f-m28fv:/tools# dotnet-dump --help
bash: dotnet-dump: command not found
root@memoryleakapp-69dc6dfc5f-m28fv:/tools# ./dotnet-dump --help
Usage:
  dotnet-dump [options] [command]

Options:
  --version         Show version information
  -?, -h, --help    Show help and usage information

Commands:
  collect                Capture dumps from a process
  analyze <dump_path>    Starts an interactive shell with debugging commands to explore a dump
  ps                     Lists the dotnet processes that dumps can be collected from.
Now we can see the processes :
root@memoryleakapp-69dc6dfc5f-m28fv:/tools# ./dotnet-dump ps
 1  dotnet  /usr/share/dotnet/dotnet  dotnet MemoryLeak.dll
Now let's collect two dump files from this process with several minutes between so we let the memory leak be more visible in them:
root@memoryleakapp-69dc6dfc5f-m28fv:/tools# ./dotnet-dump collect -p 1

Writing full to /tools/core_20221008_173927
Complete
root@memoryleakap
Once we have run twice this command, we copy these dump files from the pod to our local directory on our dev machine with the following comand:
λ kubectl cp default/memoryleakapp-69dc6dfc5f-m28fv:/tools/core_20221008_172957 core_20221008_172957.dump
It is to copy files from the pod to our machine.
First in the source: we give the namespace of the pod here default then the pod name, then a speparator ':' then file name
We give a space ' '
Then Second in the destination we give the path and file name you want.
We do the same for the second dump file:
λ kubectl cp default/memoryleakapp-69dc6dfc5f-m28fv:/tools/core_20221008_173323 core_20221008_173323.dump
Now we have our two dump files, we can use them to get the memory leak origin.
It will be the subject of our next article!
Conclusion:
We learnt how to use the microsoft tool to get a dump when we have a memory leak in a .Net Core application running within any kubernetes cluster.