Security in Vuejs 3.0, with authentication and authorization by KeyCloak Part 2.


Introduction
Part 2 Add Keycloak in a Login Component
Part 1 Click Here
Today we will see how to add a vuejs component to use the user information of the Access Tokens returned by Keycloak.
You can see the first part: https://blog.devgenius.io/security-in-vuejs-3-0-with-authentication-and-authorization-by-keycloak-part-1-ae884889fa0d
Adding the Login component
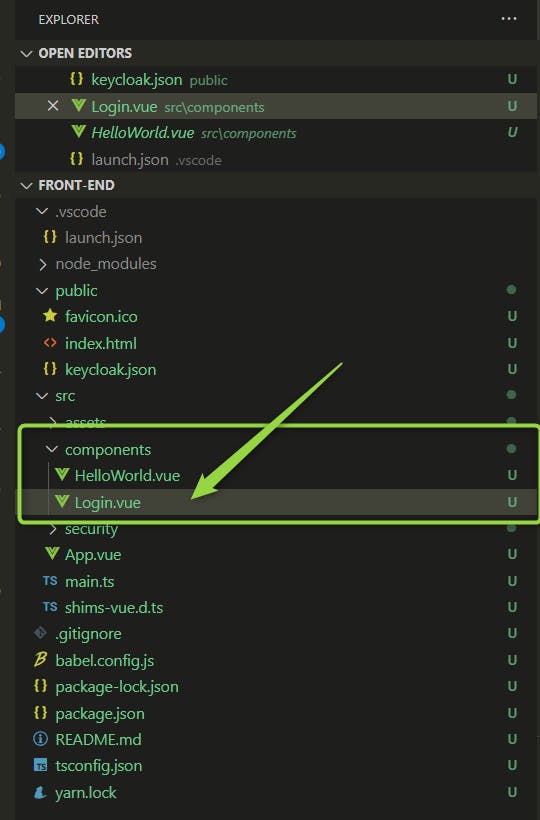
First, we will add a new Component called: Login.vue
We will import into the component the information about :
the Access Token
the user name, role(s)
and see how to add a link to log out :)
First thing first, we need to update our KeycloakService.ts (see the previous article here)
import Keycloak from "keycloak-js";

const keycloakInstance = new Keycloak();

interface CallbackOneParam<T1 = void, T2 = void> {
  (param1: T1): T2;
}
/**
 * Initializes Keycloak instance and calls the provided callback function if successfully authenticated.
 *
 * @param onAuthenticatedCallback
 */
const Login = (onAuthenticatedCallback: CallbackOneParam): void => {
  keycloakInstance
    .init({ onLoad: "login-required" })
    .then(function (authenticated) {
      authenticated ? onAuthenticatedCallback() : alert("non authenticated");
    })
    .catch((e) => {
      console.dir(e);
      console.log(`keycloak init exception: ${e}`);
    });
};

const UserName = (): string | undefined =>
  keycloakInstance?.tokenParsed?.preferred_username;

const Token = (): string | undefined => keycloakInstance?.token;

const LogOut = () => keycloakInstance.logout();

const KeyCloakService = {
  CallLogin: Login,
  GetUserName: UserName,
  GetAccesToken: Token,
  CallLogOut: LogOut,
};

export default KeyCloakService;
We just used the parsed token returned Keycloak and export it as GetUserName in the interface.
We just returned the Access Token in the string format.
We added the LogOut to call the logout method.
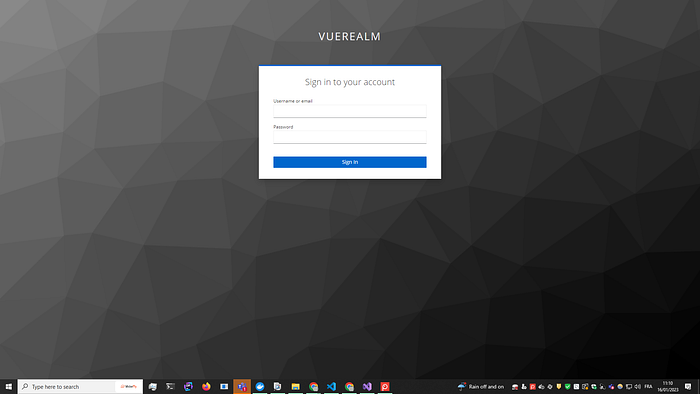
Let’s try it on our component!
<template>
  <div class="login">
    <h2>Login {{ Login() }}</h2>
    <h2>Access Token {{ AccessToken() }}</h2>
    <button @click="LogOut">Log Out</button>
  </div>
</template>

<script lang="ts">
import { defineComponent } from "vue";
import KeyCloakService from "../security/KeycloakService";

export default defineComponent({
  name: "Login",
  methods: {
    Login() {
      return KeyCloakService.GetUserName();
    },
    AccessToken() {
      return KeyCloakService.GetAccesToken();
    },
    LogOut() {
      return KeyCloakService.CallLogOut();
    },
  },
});
</script>

<!-- Add "scoped" attribute to limit CSS to this component only -->
<style scoped>
h3 {
  margin: 40px 0 0;
}
ul {
  list-style-type: none;
  padding: 0;
}
li {
  display: inline-block;
  margin: 0 10px;
}
a {
  color: #42b983;
}
</style>
We just imported our KeyCloakService and defined the methods to use it.
Finally, we call each of these methods in the HTML template :)
One subtle point we need to add the following setting on KeyCloak to make the redirection work when we log out:

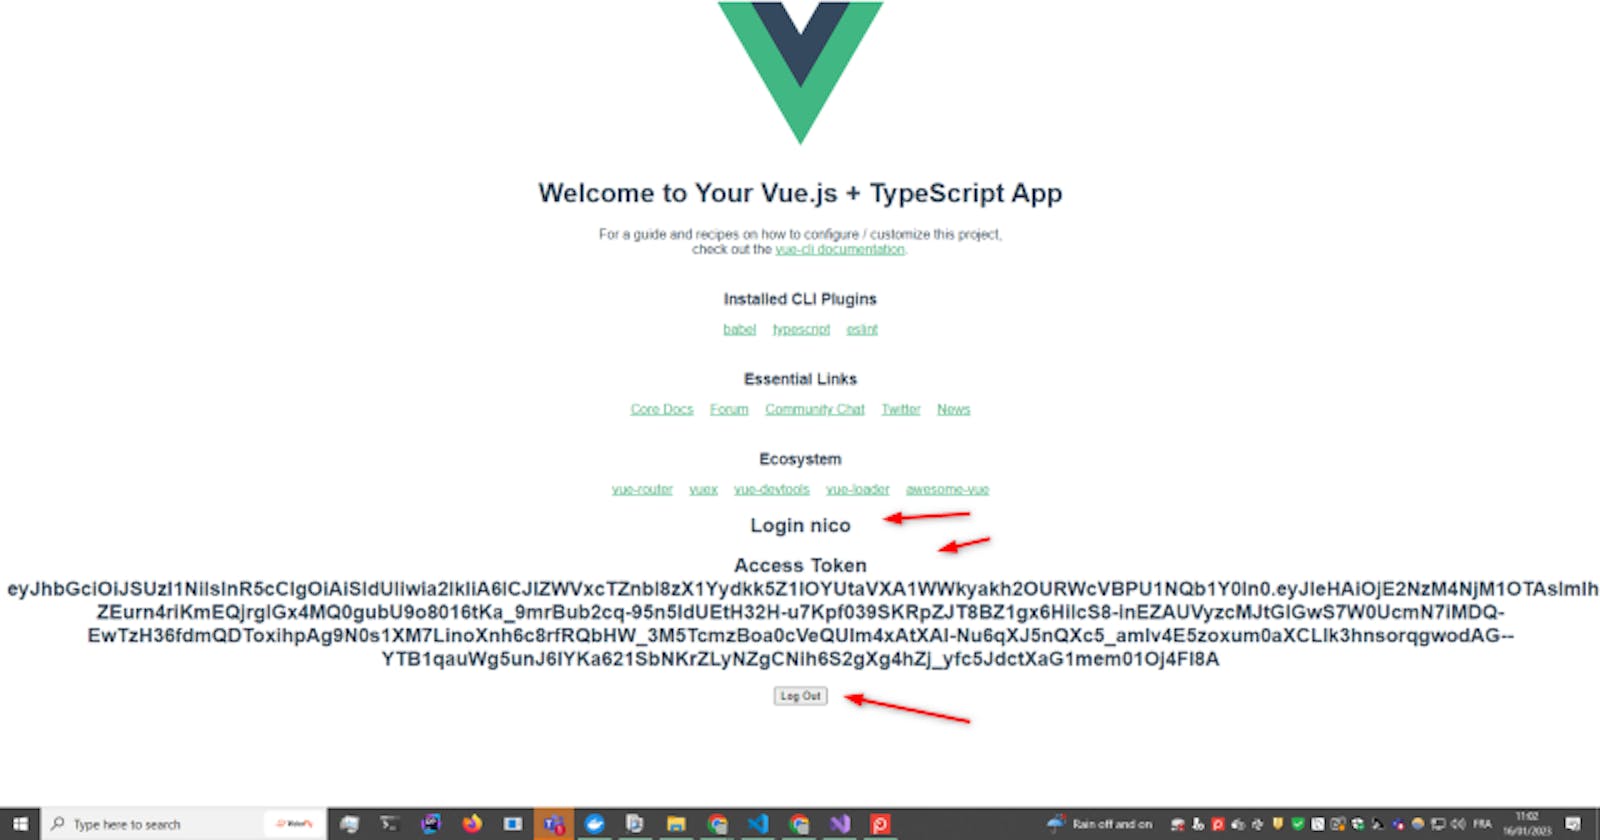
Let’s try now.
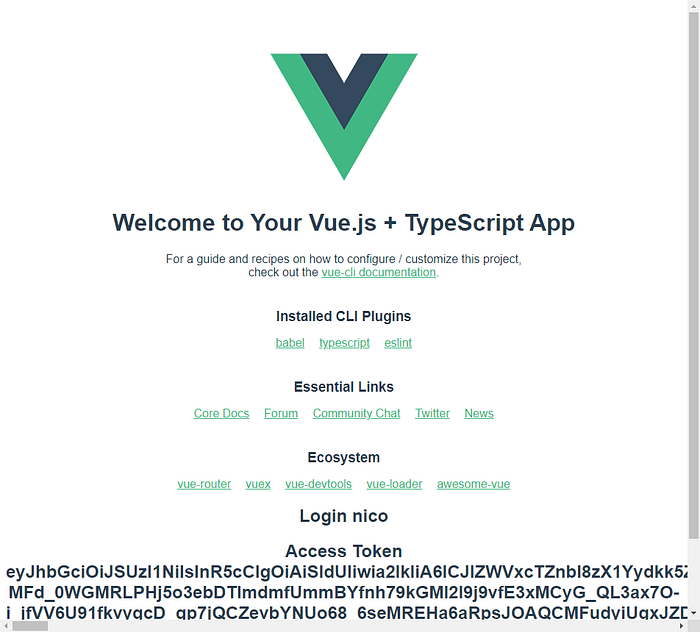
We can see the login we used, and the JWT access Token we can use on the web site https://jwt.io/
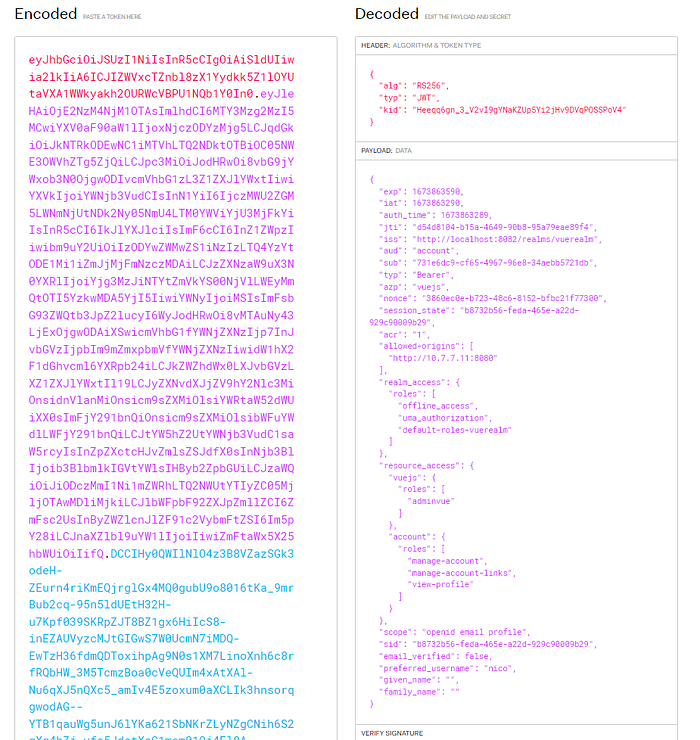
We will use it to return the role(s) of our user within the client called vuejs :)
Let’s click on the Log Out button:
It works perfectly.
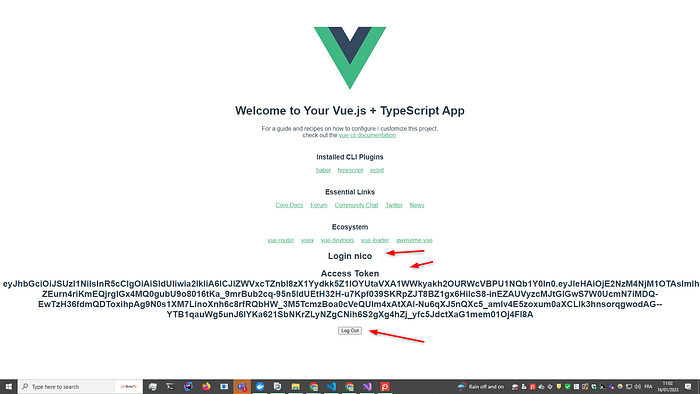
At last, let’s log in and check we can go back to the application home page:
All is good folks :)
Displaying the user's roles
At last, let’s display the user’s role(s).
We need to remember the user can have several roles, so we need to return a list.
import Keycloak from "keycloak-js";

const keycloakInstance = new Keycloak();

interface CallbackOneParam<T1 = void, T2 = void> {
  (param1: T1): T2;
}
/**
 * Initializes Keycloak instance and calls the provided callback function if successfully authenticated.
 *
 * @param onAuthenticatedCallback
 */
const Login = (onAuthenticatedCallback: CallbackOneParam): void => {
  keycloakInstance
    .init({ onLoad: "login-required" })
    .then(function (authenticated) {
      authenticated ? onAuthenticatedCallback() : alert("non authenticated");
    })
    .catch((e) => {
      console.dir(e);
      console.log(`keycloak init exception: ${e}`);
    });
};

const UserName = (): string | undefined =>
  keycloakInstance?.tokenParsed?.preferred_username;

const Token = (): string | undefined => keycloakInstance?.token;

const LogOut = () => keycloakInstance.logout();

const UserRoles = (): string[] | undefined => {
  if (keycloakInstance.resourceAccess === undefined) return undefined;
  return keycloakInstance.resourceAccess["vuejs"].roles;
};

const KeyCloakService = {
  CallLogin: Login,
  GetUserName: UserName,
  GetAccesToken: Token,
  CallLogOut: LogOut,
  GetUserRoles: UserRoles,
};

export default KeyCloakService;
Note: we wrote “vuejs” hard-cored, it is for demo purposes only! We should use this info from the configuration in prod.
Let’s add the roles in the Login vuejs component:
<template>
  <div class="login">
    <h2>Login {{ Login() }}</h2>
    <h2>Roles {{ UserRoles()?.join(" ") }}</h2>
    <h2>Access Token {{ AccessToken() }}</h2>
    <button @click="LogOut">Log Out</button>
  </div>
</template>

<script lang="ts">
import { defineComponent } from "vue";
import KeyCloakService from "../security/KeycloakService";

export default defineComponent({
  name: "Login",
  methods: {
    Login() {
      return KeyCloakService.GetUserName();
    },
    AccessToken() {
      return KeyCloakService.GetAccesToken();
    },
    LogOut() {
      return KeyCloakService.CallLogOut();
    },
    UserRoles() {
      return KeyCloakService.GetUserRoles();
    },
  },
});
</script>

<!-- Add "scoped" attribute to limit CSS to this component only -->
<style scoped>
h3 {
  margin: 40px 0 0;
}
ul {
  list-style-type: none;
  padding: 0;
}
li {
  display: inline-block;
  margin: 0 10px;
}
a {
  color: #42b983;
}
</style>
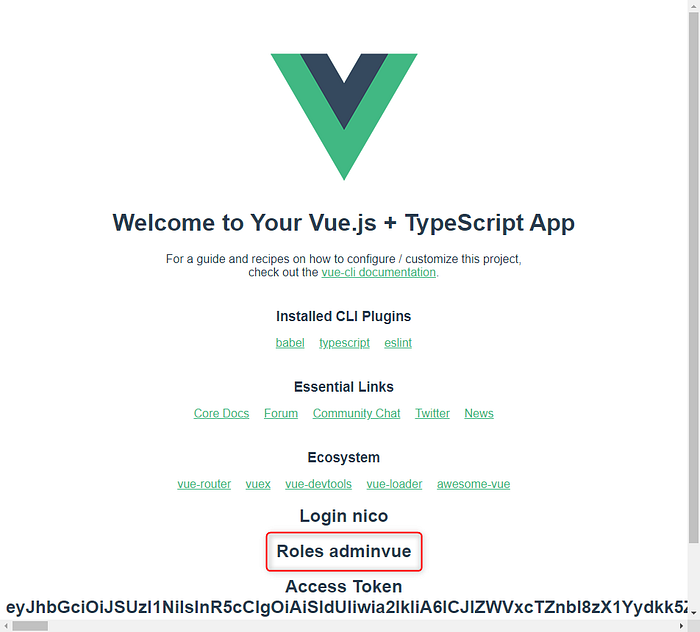
Because we return a String array, we join the items :)
We can see the result:
Conclusion:
It’s the end of part 2.
We saw together how to use the keycloak js adapter in our vuejs application.
I remind you it is only a demo and we need to improve the code for production with the best practices :)
In part 3 we will see how to send the JWT access token to our secured ASP.NET Core Web API which will consume our access token and validate it.
Please if you like this tutorial, subscribe and don’t hesitate to clap or ask questions. I will answer within 24h. Cheers!